10. Lab II: Solution
Solution: Build a Dog Microservice - Spring Data REST
Below, we'll walk through each step of the lab and look at one potential way to implement the lab. Even if you get stuck, you should always first try to work through the lab without the solution before coming here, so that you can best learn the related skills and be ready for the project at the end of the course.
Step 0: Create a SpringBoot project/module for an eventual microservice.
We skipped this step on the original lab page, but it's essentially inferred to get us started. This can either be a new project (in which case you would need the Eureka server running in a separate window) or a new module. Since so far we've been using Spring Initializr as a separate project, I will approach it as such below.
Along with JPA, H2 and Spring Web Starter, you can add Rest Repositories (for spring-boot-starter-data-rest), Cloud Config, and also Eureka Discovery Client, which we won't utilize until the last part of the lab in this lesson (you can always update your POM file with this later, if necessary). If you need to debug, you might comment out the Eureka discovery client, as otherwise you'll see a lot of messages being output depending on whether it is connected to your Eureka server yet.
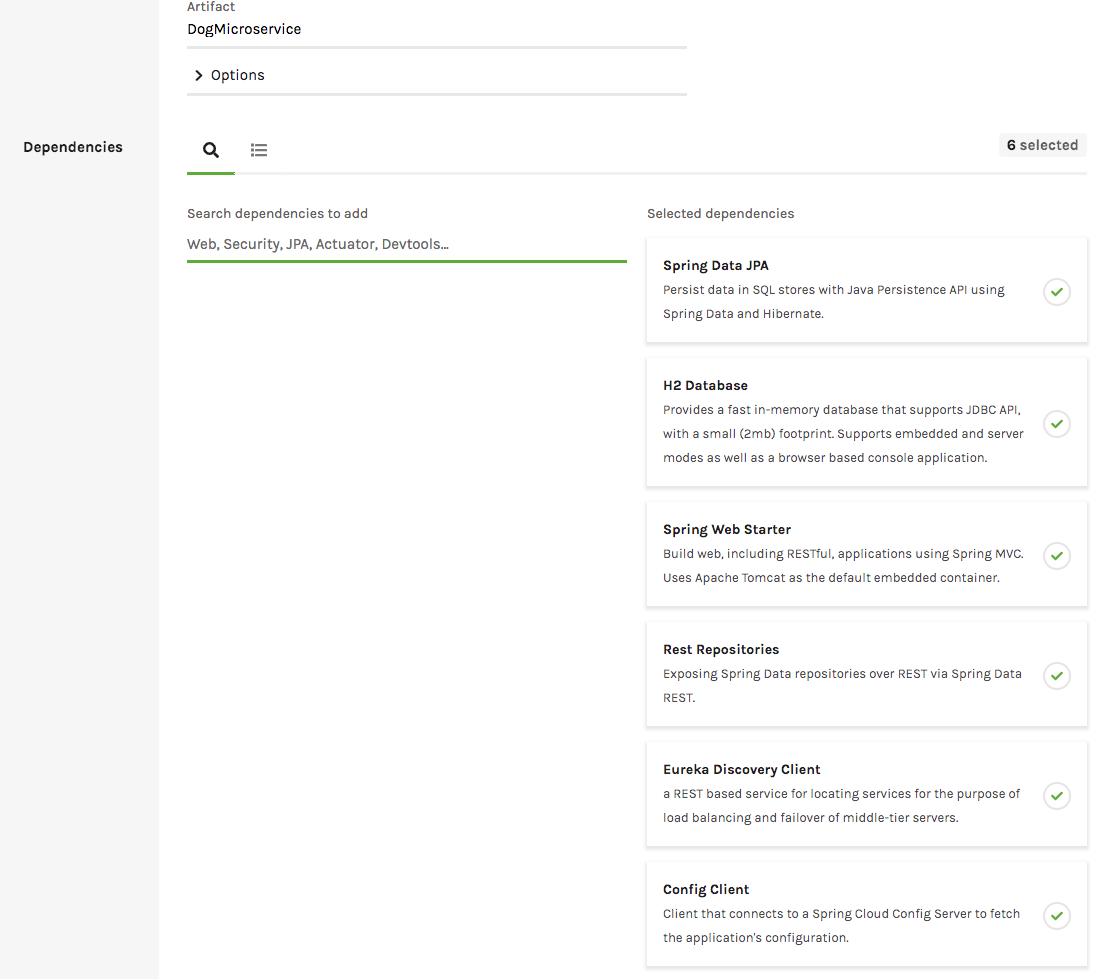
Adding the dependencies for the microservice
Don't forget to add anything you may need for H2 to application.properties here! I re-used the same lines from the REST API in mine.
Step 1: Create an entity called Dog.
- The dog should have three attributes:
- Name
- Breed
- Origin
You can re-use your code from the REST API for the Dog entity, just make sure to update the package name accordingly!
Step 2: Create a repository that extends CrudRepository.
- This repository is for creating, reading, updating, and deleting Dog objects.
- Note: This repository will not need to implement anything beyond an interface.
Depending on your implementation, this can be re-used from either the REST API or GraphQL API. In this case, we don't need to add anything within the interface here.
package com.udacity.DogMicroservice.repository;

import com.udacity.DogMicroservice.entity.Dog;
import org.springframework.data.repository.CrudRepository;

public interface DogRepository extends CrudRepository<Dog, Long> {
}
Step 3: Create a data.sql file.
- The file should create sample dog data in the database.
You can either re-use your previous data.sql files here or create a new one.
Step 4: Create a microservice using Spring Data REST.
- Include the proper dependencies in the Maven POM file.
If you've been following since Step 0, this was actually done by including Rest Repositories within Spring Initializr, but otherwise, you can add the following to your POM file:
        <dependency>
            <groupId>org.springframework.boot</groupId>
            <artifactId>spring-boot-starter-data-rest</artifactId>
        </dependency>
Amazingly, you have now created a microservice to serve up the dogs' information! Spring Data Rest is handling most of the work for you, although since this is a microservice, it is more limited in what it does on its own (we don't have the explicit functionality to just get dog names here, for instance).
Step 5: Check that you are able to access your microservice.
While it might feel like we have hardly coded anything yet, your microservice should now be ready! When I navigated to http://localhost:8080/dogs, I saw the below (with some formatting done by a browser extension).
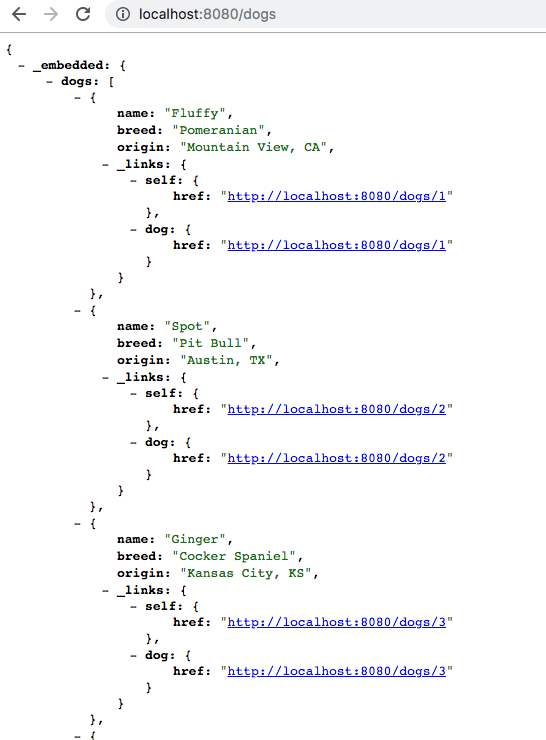
A subset of the JSON from the microservice